I know I’m not the only one who struggled many times with compiling fancy email templates used by the ASP.NET website for the user notifications.
Okay, I admit, for the long time StringBuilder was my best friend when it comes to that task.
Little better approach was by using separate .html file which contains bunch of tokens to be found and replaced from the code.
Lately, I’m really enjoying MvcMailer and ActionMailer.NET to quickly create and deploy email sending solution in my MVC applications. There is a great set of features available and those both come as a NuGet package, and both are insanely easy to use.
But…what if you want to reuse those templates and send emails from, lets say, Windows Service, WP7 app, WCF service or Silverlight app?
Recently, I had that kind of requirement and ended up using T4 Templates. I found it very handy that you can compile all your email templates in a separate .dll and just bring the reference to have them available from different apps.
Here, I will show a simple example of T4 Templates used for email templating in .NET.
Create new blank solution and add a new Class Library MyEmailTemplates
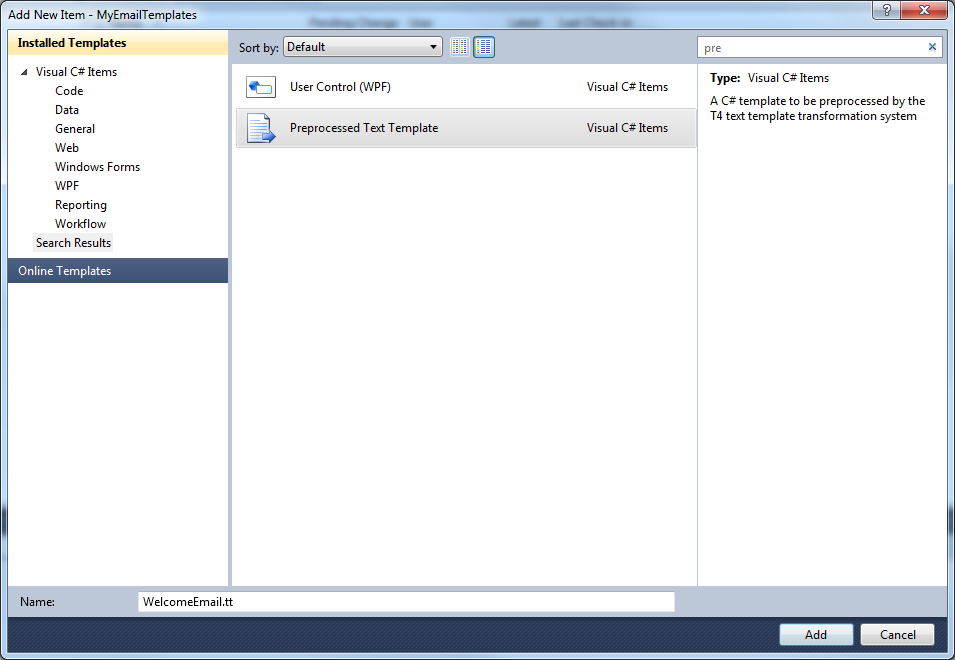
Add New Item of type WelcomeEmail.tt of type Preprocessed Text Template
Open up WelcomeEmail.tt file and update it with the simple html template.
<#@ template language="C#" #>

<!DOCTYPE HTML PUBLIC "-//W3C//DTD HTML 4.0 Transitional//EN">
<html>
	<head>
		<title>Welcome to the site!</title>
	</head>
	<body>
		Welcome Miljan!<br/>
		<br />
		You became the member of the site on 05-19-2011
	</body>
</html>
To be able to bring properties into the particular template we need to create a model. We can create the partial class to the T4 tool generated WelcomeEmail.
We are going to create a class with two simple properties FirstName and DateSigned
using System;

namespace MyEmailTemplates
{
    public partial class WelcomeEmail
    {
        public string FirstName { get; set; }
        public DateTime DateSigned { get; set; }
    }
}
Now update the WelcomeEmail.tt file to dynamically load property values from the model.
<#@ template language="C#" #>

<!DOCTYPE HTML PUBLIC "-//W3C//DTD HTML 4.0 Transitional//EN">
<html>
	<head>
		<title>Welcome to the site!</title>
	</head>
	<body>
		Welcome <#= this.FirstName #>!<br/>
		<br />
		You became the member of the site on <#= this.DateSigned.ToString("MM-dd-yyyy") #>
	</body>
</html>
OK. We are done with the template part. Lets create a MVC application to test the templating solution
Create new ASP.NET MVC 3 application and add a reference to the MyEmailTemplates project.
Update web.config file so the email delivery is set to the local folder just for the testing purposes.
<system.net>
    <mailSettings>
      <smtp deliveryMethod="SpecifiedPickupDirectory">
        <specifiedPickupDirectory pickupDirectoryLocation="C:\temp"/>
      </smtp>
    </mailSettings>
  </system.net>
Create a HomeController with a single Index action and generate a View from it.
Update your HomeController with the following
using System;
using System.Web.Mvc;
using System.Net.Mail;
using MyEmailTemplates;

namespace MyMvcApp.Controllers
{
    public class HomeController : Controller
    {
        public ActionResult Index()
        {
            var message = new MailMessage();
            message.From = new MailAddress("from@email.com");
            message.To.Add(new MailAddress("to@email.com"));
            message.Subject = "Welcome to the site email";
            message.IsBodyHtml = true;

            //here we are passing property values which will be used by template
            message.Body = new WelcomeEmail() {
                FirstName = "Miljan",
                DateSigned = DateTime.Now
            }.TransformText();

            SmtpClient client = new SmtpClient();
            client.Send(message);

            return View();
        }
    }
}
You can see the TransformText() method which creates the string out of the WelcomeEmail. That string we can use for the email body.
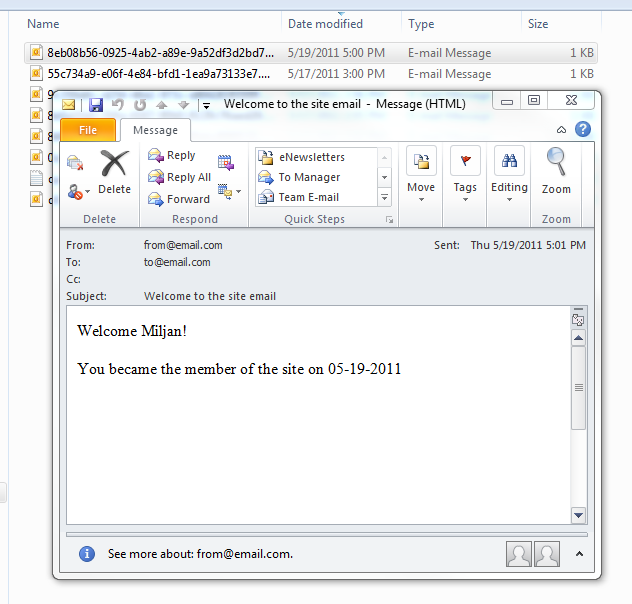
After we run the app, and open up c:\temp folder we can see the email which has been created.
That’s it. Let me know what you think.

